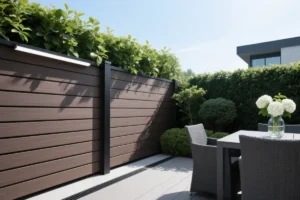
Are you looking to add a stylish, durable WPC fence to your yard or patio? The high installation fees can be discouraging, but don’t worry! This comprehensive DIY guide will show you how to install WPC fence yourself. By following these steps, you can save thousands on labor costs and enjoy the satisfaction of a job well done!
Why DIY? Save Money and Gain Satisfaction
Installing WPC fencing can be a great way to save money. Instead of paying for expensive labor, you’ll only need to cover the cost of materials. WPC fences are durable and easy to install, and with the right tools and a little patience, you can install it yourself. The money you save on installation fees could easily amount to thousands of dollars.
Key Tools You Will Need
Before you begin, make sure you have the right tools. Here’s a list of essential tools for your WPC fence installation:
- Power Saw (Circular or Hand Saw): For cutting WPC boards and posts. WPC material is hard, and using a hand saw can be time-consuming.
- Impact Drill + Concrete Drill Bits: To drill holes into hard surfaces like concrete or tiles for your ground stakes.
- Cordless Drill/Electric Screwdriver: To tighten screws, especially expansion screws and brackets.
- Wrench (Adjustable or Open Wrench): To secure the expansion screw nuts.
- Level (At least 60 cm): For ensuring vertical posts and horizontal rails.
- Tape Measure (5 meters or more): To measure distances and cut accurately.
- Rubber Mallet: To gently tap WPC boards into place without damaging them.
- Safety Gear: Don’t forget protective glasses, cut-resistant gloves, and a dust mask for safety!
Materials You’ll Need for the Fence
Here’s a list of materials you’ll need for your WPC fence installation:
- WPC Fence Boards: Measure the total length of the fence and calculate the number of boards needed.
- WPC Posts: The number of posts needed is equal to the number of fence sections plus one. Posts should match the size of the ground stakes.
- Ground Stakes (Iron Feet): These are the core load-bearing components. Ensure they are made of galvanized steel or stainless steel for durability.
- Expansion Screws: These screws will secure the ground stakes to the surface.
- Angle Brackets & Screws: Used for fixing the rails to the posts.
Step-by-Step DIY WPC Fence Installation
Step 1: Plan and Mark Your Fence Line
The first step in your DIY WPC fence installation is to plan the fence layout. Start by measuring the total length of the fence line. Mark where each post will go, typically spaced 1.5 to 2.5 meters apart. Mark the center of each post location on the ground using a tape measure and chalk or a marker. Ensure these points are aligned properly with a long straight edge.
Step 2: Install the Ground Stakes
Once the posts are marked, it’s time to install the ground stakes:
- Drill Holes: Use an impact drill with the appropriate concrete drill bit to drill holes at each marked location. Make sure the holes are deep enough for the expansion screws to fit.
- Insert Expansion Tubes: Place the expansion tubes (plastic sleeves) into the holes to prepare for the stakes.
- Place the Ground Stakes: Align the holes of the ground stakes with the expansion screw rods and place them in the drilled holes.
- Level the Stakes: Use a level to ensure the ground stakes are perfectly horizontal and vertical. This step is crucial for a straight and stable fence.
- Tighten the Nuts: Secure the ground stakes by tightening the nuts with a wrench. Repeat this process for all the stakes.

Step 3: Install the WPC Posts
After securing the ground stakes, the next step is to install the WPC posts:
- Attach Post Caps (if provided): If you’re using decorative post caps, place them on the bottom of each post.
- Insert Posts: Slide the posts into the ground stakes and check that they are fully inserted.
- Check Vertical Alignment: Use a level to make sure each post is perfectly vertical. If necessary, adjust the position slightly.
- Fix the Posts: Most WPC fences are secured by the weight of the boards and the top rails. However, if your posts have lateral screw holes, you can fix them using WPC screws for added stability.

Step 4: Install the Bottom Rails
Now that your posts are installed, it’s time to add the bottom rails:
- Cut the Rails: Measure and cut the bottom rails to the required length based on the post spacing.
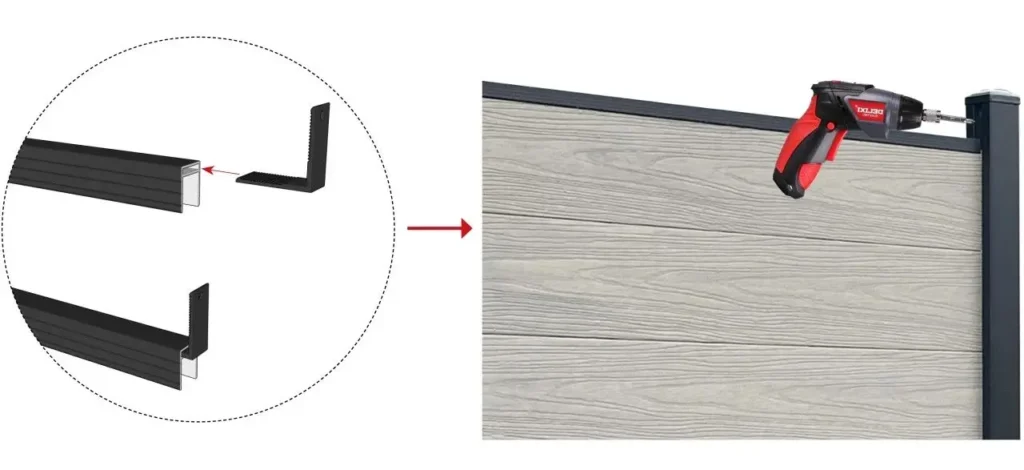
- Install Angle Brackets: Attach angle brackets to both ends of the bottom rails.
- Place the Rails: Place the bottom rails between the posts, ensuring they are level and at the right height.
- Fix the Rails: Use screws to secure the angle brackets to the posts, ensuring the rails are tightly fixed.

Step 5: Attach the Fence Boards
This is the most satisfying part of the DIY installation process:
- Prepare the First Board: If you’re using a semi-enclosed or lattice design, attach the spacer clips to the bottom of the first board.
- Install the First Board: Slide the first board into the bottom rail slot and gently tap it into place using a rubber mallet.
- Install Subsequent Boards: Place each new board next to the previous one, ensuring they fit tightly together. Check the alignment as you go.
- Use Spacer Clips (if needed): If your design includes gaps between the boards, place spacer clips to maintain even spacing.
- Cut the Last Board: If the last board doesn’t fit perfectly, measure and cut it to size.

Step 6: Install the Top Rails and Post Caps
Finally, secure the top rails and post caps:
- Cut the Top Rails: Measure and cut the top rails to match the length of the fence.
- Attach Angle Brackets: Install angle brackets at both ends of the top rails.
- Install the Top Rails: Place the top rails between the posts, ensuring they are level and securely attached with screws.
- Attach Post Caps: Place post caps on top of each post to give the fence a finished look. These caps help prevent water from entering the posts and protect the structure.
Final Inspection and Tips for Maintenance
Inspect the Fence
Once your WPC fence is installed, it’s important to check everything carefully:
- Check Stability: Test each post and section of the fence to ensure there’s no wobbling or movement.
- Check Alignment: Use a level to check the vertical alignment of the posts and the horizontal alignment of the rails.
- Tighten Screws: Go over all the screws and tighten them if necessary.
- Inspect for Damage: Look for any scratches or visible flaws that may have occurred during installation.
Maintain Your WPC Fence
WPC fences are known for their durability, but regular maintenance will help extend their lifespan:
- Clean Regularly: Wipe down the fence with water or a special cleaning agent to keep it looking its best.
- Avoid Moisture Damage: Don’t allow the fence to stay submerged in water for extended periods.
Conclusion: A Beautiful WPC Fence, Made by You
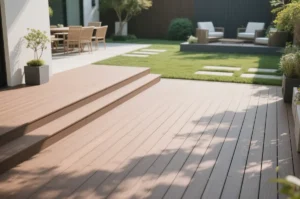
Installing your own WPC fence is a rewarding project that saves you money and gives you a sense of accomplishment. With the right tools, materials, and patience, you can create a beautiful, durable fence that will enhance the look of your yard or patio for years to come. So why wait? Start your DIY WPC fence installation today and enjoy the benefits of a custom fence at a fraction of the cost! Not only WPC fence, you can also install WPC decking by yourself according this decking boards installation guide.