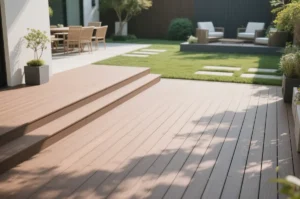
WPC decking (Wood-Plastic Composite) has become a leading choice for outdoor flooring thanks to its durability, low maintenance, and elegant appearance. But even the best WPC decking won’t perform well without proper installation.
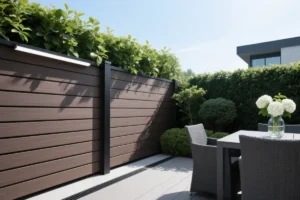
Whether you’re a DIY enthusiast or a professional builder, this guide will walk you through how to install WPC decking correctly—from site preparation to finishing touches—ensuring a long-lasting and beautiful result. If you also plan to install a WPC fence, follow this WPC fence installation guide for step-by-step instructions.
✅ What Is WPC Decking?
Before diving into the installation process, it’s helpful to understand what WPC decking is. Made from a blend of recycled wood fibers and plastic, WPC boards offer the natural look of wood without its common issues like rot, warping, or insect damage.
WPC decking is ideal for:
- Patios and backyards
- Balconies and rooftops
- Poolside areas
- Commercial terraces and walkways
Installation is relatively straightforward, but following best practices is essential.
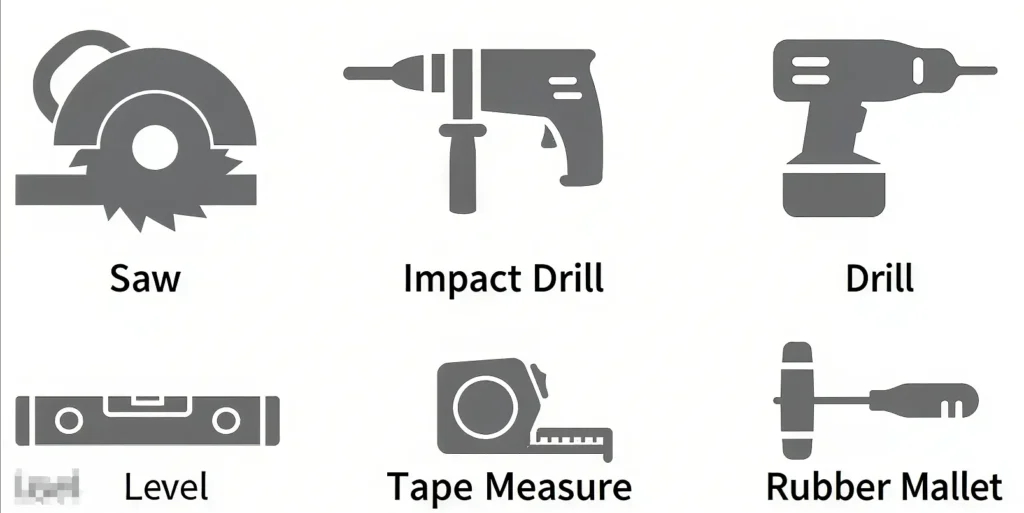
🧰 Tools and Materials You’ll Need
To install WPC decking, you’ll need some standard tools. Here’s a checklist:
- Measuring tape and level
- Power drill or screwdriver
- Rubber mallet
- Circular saw or jigsaw
- Safety gloves and eyewear
- Starter clips, hidden fasteners, or screws (as per system used)
- Joists or sub-frame (wood, WPC, or aluminum)
- Chalk line or laser level
Optional:
- Weed barrier or geotextile fabric (for installations on soil)
- Edge trim or fascia boards (for a finished look)
🏗️ Step 1: Prepare the Ground Surface
A strong, stable foundation is the key to a successful decking project.
Choose a base depending on your site:
| Surface Type | Recommendation |
|---|---|
| Concrete slab | Ideal. Ensure it’s clean, dry, and level. |
| Gravel or soil | Compact well, add a weed barrier, and use concrete piers or pedestals for support. |
| Rooftop/Balcony | Check for load-bearing limits; use adjustable pedestals if needed. |
Tip: Never install WPC decking directly on bare soil without proper drainage and support. Moisture can affect performance and lifespan.

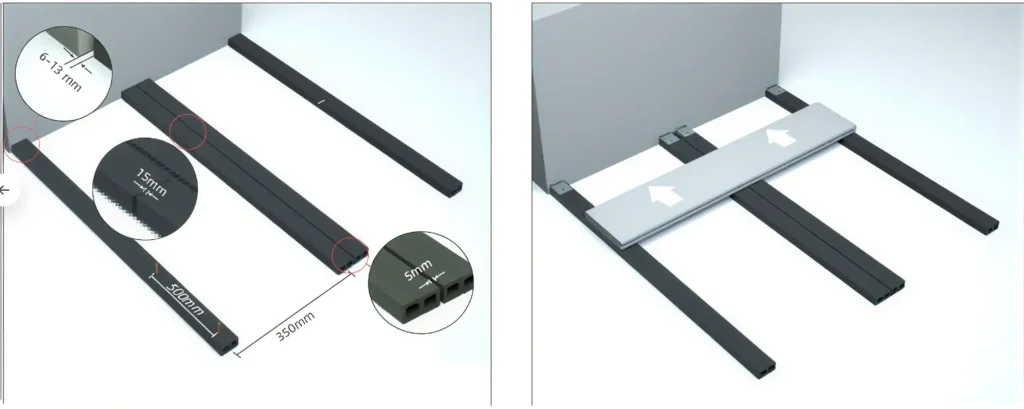
🔧 Step 2: Install the Sub-Frame (Joists)
Your joist structure supports the entire deck, so it needs to be solid.
- Use treated wood, aluminum, or WPC joists.
- Space joists 300–400mm (12–16 inches) apart, center-to-center.
- Ensure all joists are level and parallel.
- Use expansion spacers or leave a slight slope (1–2%) away from buildings for drainage.
If your WPC garden decking runs perpendicular to a wall or structure, allow at least 5–10mm of clearance for ventilation and thermal expansion.
🪚 Step 3: Lay the First WPC Decking Board
Begin installing from the edge closest to a wall or structure.
- Fix starter clips to the joists to secure the first board in place.
- Slide the first board into the clips and tap gently with a rubber mallet.
⚠️ Don’t use nails. Always use manufacturer-approved fasteners or clips.
🧩 Step 4: Continue with Hidden Fasteners or Screws
Most WPC decking uses a hidden fastener system:
- Place a plastic or stainless steel clip between two boards.
- Screw the clip into the joist through the hole provided.
- Slide the next board into the clip.
- Repeat across the deck, ensuring consistent board spacing.
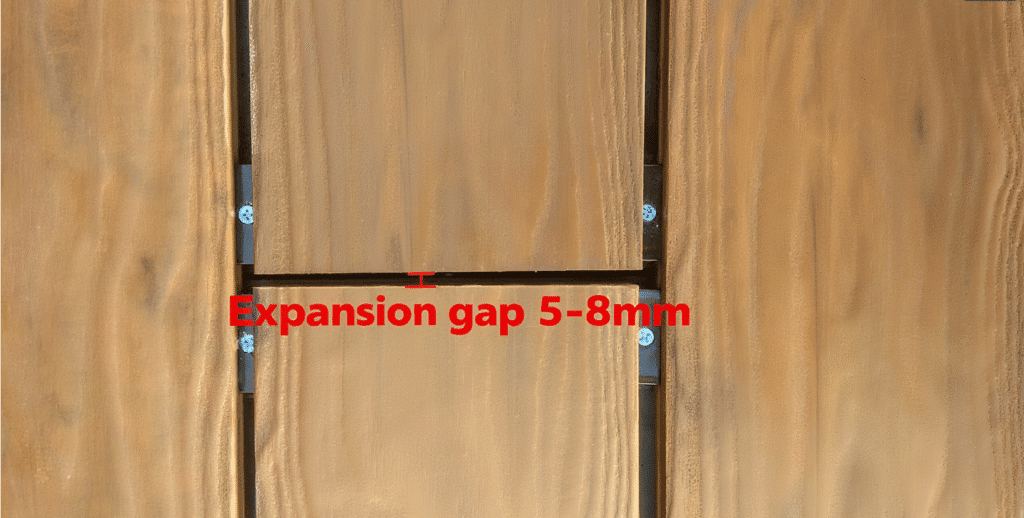
Expansion gaps: Leave 3–6mm between boards and 5–10mm between boards and fixed objects (walls, posts, etc.). These gaps allow for expansion in heat and contraction in cold.
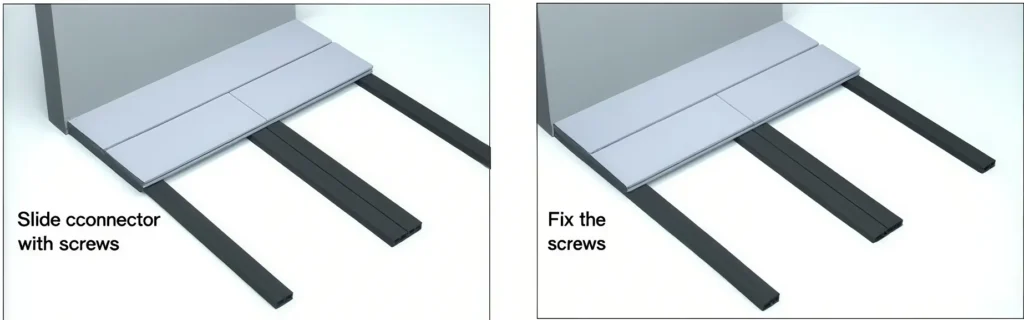
🪛 Step 5: Finishing the Last Board
- Use end clips or pre-drill and screw the last board in place.
- If needed, trim the final board to fit the remaining space.
- Check alignment and make any final adjustments.
🧱 Optional: Add Edging and Fascia Boards
To improve aesthetics and prevent debris buildup:
- Install fascia boards along the edges of the deck.
- Use corner trims to cover visible gaps or structural components.
⚠️ Common Mistakes to Avoid
Avoiding these mistakes will save you future headaches:
| Mistake | Consequence |
|---|---|
| No expansion gap | Boards may warp or crack |
| Installing directly on soil | Leads to moisture damage |
| Using non-compatible screws | May cause splitting or corrosion |
| Skipping leveling check | Results in uneven surface |
🧽 After Installation: Care and Maintenance Tips
WPC decking is low-maintenance, but basic care goes a long way:
- Sweep regularly to remove debris.
- Wash with water and mild detergent when dirty.
- Avoid dragging heavy furniture across the surface.
- Check fasteners once or twice a year for tightness.
Unlike wood, no staining, sealing, or sanding is needed.
📐 Example Installation Layout
If your deck is 3 meters wide, here’s a sample layout:
- Joist spacing: 35cm
- Deck board length: 2.2m
- Gaps between boards: 5mm
- Allow border space: 10mm
Plan ahead to minimize board cutting and waste.
📌 Conclusion: WPC Decking Installation Made Simple
Installing WPC decking is a smart, long-term investment for your outdoor space. By following the correct steps—from preparing the base to allowing for expansion—you’ll enjoy a secure, stylish, and weather-resistant deck for years to come. How should you maintain a WPC fence during daily use? You can learn more from this article WPC decking problems.
Whether you’re building a backyard escape or a rooftop lounge, proper installation is the foundation of success.